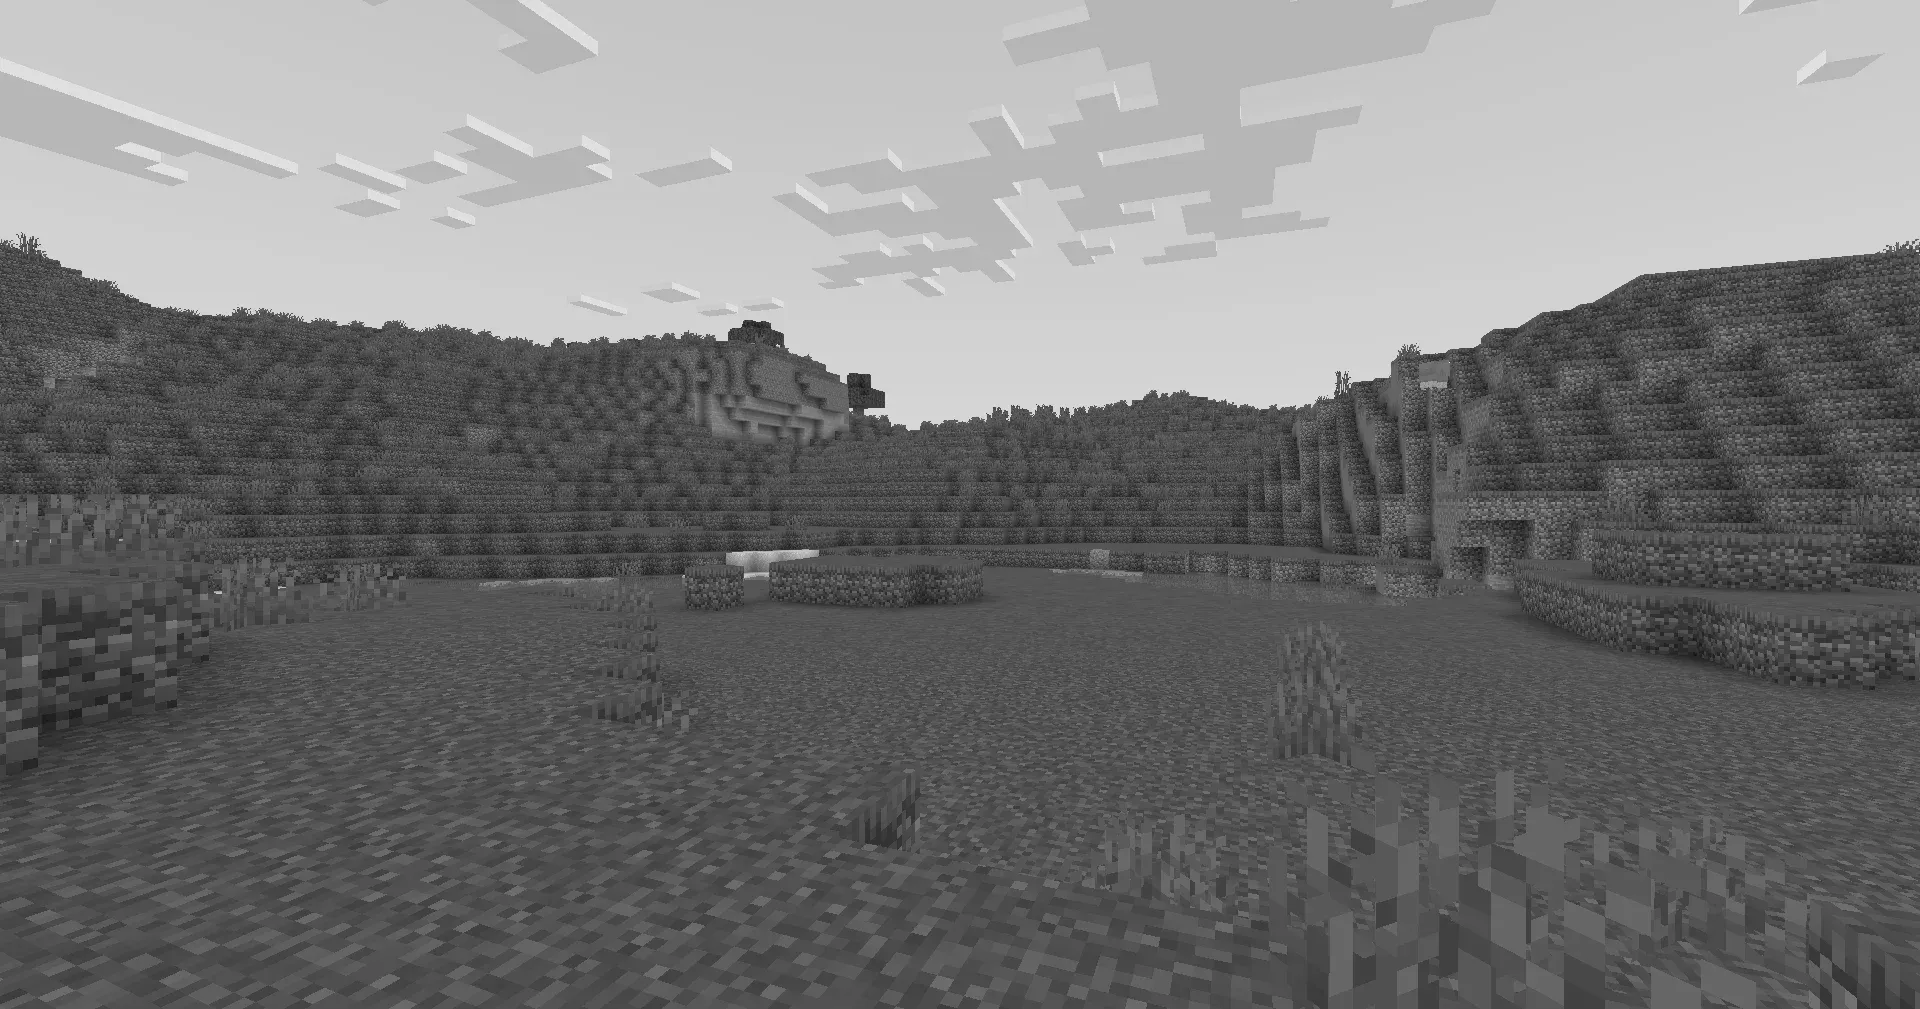
Simple Post Effects
Setting up the file structure
Minecraft shaders require a specific structure of files in the right places to load code. While it’s important to understand this structure, to save time, we will be working with the Base 330 pack from shaderLABS. Download it from here, and extract it into your shaderpacks folder. You should have the following structure.
.└── .minecraft/ └── shaderpacks/ └── Base-330-main/ ├── LICENSE ├── readme.md └── shaders/ └── ...In this stage of the tutorial, we are going to make the screen monochrome using the composite pass, so let’s rename the Base-330-main folder to composite-tutorial, or another name of your choosing.
You can also delete the LICENSE and readme.md files, as we don’t need those.
When you select the shader in the shader selection screen, you should not see any errors in the logs.
The composite pass
For this shader, we will be using the first composite pass. This is a full screen pass which runs just after all gbuffers programs have rendered.
First, let’s open composite.vsh. This is the vertex shader for the composite program. Since composite is a fullscreen pass, this actually just renders a singular quad (a rectangular polygon) to the screen which exactly covers it. This means that your fullscreen passes are technically actually running on 3D geometry! Specifically, the vertex shader will run four times, one for each corner of this quad.
#version 330 compatibility
out vec2 texcoord;
void main() {  gl_Position = ftransform();  texcoord = (gl_TextureMatrix[0] * gl_MultiTexCoord0).xy;}
Let’s analyse this.
#version 330 compatibilityThis tells the shader what version of GLSL to use, as covered earlier.
out vec2 texcoord;This is a variable declaration, but a special one. The out keyword means that the value will be passed to the fragment shader. The fragment shader can then have a corresponding in declaration which allows it to recieve this value. This is commonly referred to as a ‘varying’.
void main() {The main function is the code that is run when the shader is invoked, just like in languages like C.
gl_Position = ftransform();This transforms the position of the vertex from model space to clip space. The ftransform function is actually deprecated but Iris patches it to the relevant modern code. For more information, see the howto on coordinate spaces.
texcoord = (gl_TextureMatrix[0] * gl_MultiTexCoord0).xy;This gives us the ‘texture coordinate’ of the current vertex. This is more commonly known as the ‘UV’, and it is used so that the fragment shader knows where on the screen it is. These texture coordinates range from (0, 0) at the bottom left of the texture to (1, 1) at the top right.
Let’s open composite.fsh. This is the fragment shader It runs for every pixel on the screen.
Right now the code looks like this
#version 330 compatibility
uniform sampler2D colortex0;
in vec2 texcoord;
/* DRAWBUFFERS:0 */layout(location = 0) out vec4 color;
void main() {  color = texture(colortex0, texcoord);}
Let’s analyse this as well a bit.
uniform sampler2D colortex0This allows the shader to read from colortex0. Iris provides you with a number of colortex buffers you can read and write to. Each buffer is a texture with the same resolution as your screen. For more information on the colortex buffers, see the docs. colortex0 usually contains the main scene, and we can use the other 15 for whatever we want.
in vec2 texcoordThis is where we recieve the texcoord passed out in the vertex shader. This tells us what pixel to sample from colortex0.
/* RENDERTARGETS: 0 */This is a comment that the Iris patcher reads. It tells the shader to write back to colortex0. For more info, see the docs.
layout(location = 0) out vec4 color;This declares a variable color which at the end of the shader will be written to colortex0.
color = texture(colortex0, texcoord);This reads the value in colortex0 at position texcoord and stores it in color. For more info see the OpenGL docs.
Making it monochrome
To make a color monochrome, we need to operate only on the r, g, and b components of the color. We can access and modify these these with color.rgb.
To actually do the operation, we can take a bit of a shortcut, and set every component to the dot product with a 3d vector of 1/3. This vector can be represented as vec3(1.0/3.0). This operation is mathematically equivalent to taking one third of each component and adding them together.
So, after we get the value of color, we can do:
color.rgb = vec3(dot(color.rgb, vec3(1.0/3.0)));Your screen should now look like this!

